Granting the user full administrative rights over the OS, sudo is one of the most important — and dangerous — commands in Linux. Here’s how to use it wisely.
You’ve probably seen the XKCD cartoon wherein one person asks another to make them a sandwich. When the second person refuses, the first responds with, “sudo make me a sandwich.”
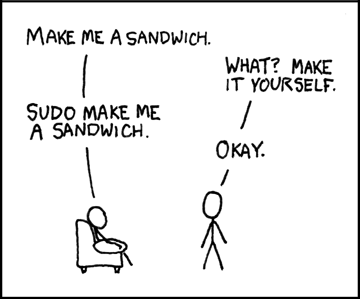
Of course, any Linux user would smirk at the idea, knowing the second person would then have no choice but to make the sandwich. Why? Because… sudo!
Sudo stands for super user do and is the equivalent of the Windows run as command.
Let me give you a bit of background.
When I first started using Linux (around 1997), in order to install software, compile a kernel, or do anything that required administrative rights, I had to first change to the root (or super) user with the command su (or su –, if you needed to include root’s environment). Back then, we thought nothing of it. In fact, one could log into the Linux computer as the root user or even secure shell into a machine as the root user.
It was a real cats and dogs living together situation and we had no idea the dangers it posed.
You see, with the root user available, anyone could access those powers (if they knew — or could crack — the root user’s password). And allowing root SSH access was a disaster waiting to happen.
Imagine this scenario: You log into your Linux machine as the root user and do some random task. You’re then called away from that computer and forget to lock the desktop. Anyone could then sidle on up to the machine and have their way… with full admin powers.
You do not want to land in such a situation. In fact, as a rule of thumb, you should never log in as the root user and avoid changing to root at all costs. That’s why you need the help of sudo
Fortunately, well before I started using Linux, Robert Coggeshall and Cliff Spenser wrote the original subsystem for sudo. The initial release was sometime around 1980. Between 1986 and 1993, sudo was substantially modified by the IT staff at the University of Colorado Bolder. Around 1994, sudo fell under the watch and care of Todd C. Miller (an OpenBSD developer) who has been the caretaker ever since.
What Does sudo Do?
Essentially, sudo gives users (who belong to the necessary groups) temporarily elevated permission, so they can run admin tasks (such as installing software or modifying configuration files with the likes of /etc.
To use this tool, users type sudo followed by the command they want to run. They are then prompted for their user password and, upon successful authentication, the command will run.
By using sudo, the root user is not used, touched, or affected. Once a user successfully runs a command with sudo, they have a grace period of 5 minutes until they’ll be prompted to type their user password for another sudo command.
In other words, you could run a command like sudo apt-get upgrade -y and, once it completes, turn around and run a command like sudo systemctl restart sshd, without having to retype your user password. If the next command is run outside of that five-minute window, you’ll have to retype your user password.
Adding Users to the Required Group
When you add a user to Linux, some distributions will automatically add them to sudo. Most, however, do not. How you add a user to the necessary group depends on the distribution you use. For example, Ubuntu-based distributions use the sudo group, whereas Fedora-based distributions use the wheel group.
So, to add a user to the sudo group, the command would be something like this:
sudo usermod -aG sudo USER
Where USER is the username to be added.
To add a user to the wheel group, the command would be something like this:
sudo usermod -aG wheel USER
Where USER is the username.
The user must then log out and log back in for the changes to take effect. Once they’ve logged back in, they have the full power of sudo at their disposal.
The sudoers File
This is where sudo gets a bit tricky. The sudoers file is where sudo is configured. This file is so important that it has its own built-in editor (in other words, never edit /etc/sudoers with a normal text editor), called visudo. The visudo editor validates the syntax of the sudoers file when you go to save. This way you are less likely to introduce errors in the configuration, which could be disastrous.
To open the sudoers file, issue the command:
sudo visudo
You’ll be prompted for your user password and, upon successful authentication, you’ll be presented with the sudoers file in your default text editor (such as nano). The layout of a sudoers file line looks like this:
root ALL=(ALL:ALL) ALL
Each ALL has a specific meaning:
- The first ALL indicates that the rule applies to all hosts.
- The second ALL indicates that the root users can run commands as all users.
- The third ALL indicates the root user can run commands as all groups.
- The fourth ALL indicates the rules apply to all commands.
I told you it was tricky.
You can create aliases in the sudoers file, to make creating custom rules even easier. Let’s say you want to create a rule that applies to users olivia, camille, anton, and clara. Let’s say you want to give those users access to the apt-get update and apt-get upgrade commands and only those commands. For that, you could create an alias within the sudoers file like this:
User_Alias GROUPONE = olivia, camille, anton, clara
You would then give the new group access to the commands like this:
GROUPONE ALL = /usr/bin/apt-get update
GROUPONE ALL = /usr/bin/apt-get upgrade
After saving and closing the file, the users in GROUPONE will then be able to run the two commands.
Your best bet, however, is to use the sudo and wheel groups, so you don’t risk wreaking havoc on your machine via the sudoers file. However, if you need to get granular with admin permissions, sudoers is the way to go.
To learn more about sudo, read the manual with the command "man sudo".